- Home
- Installation
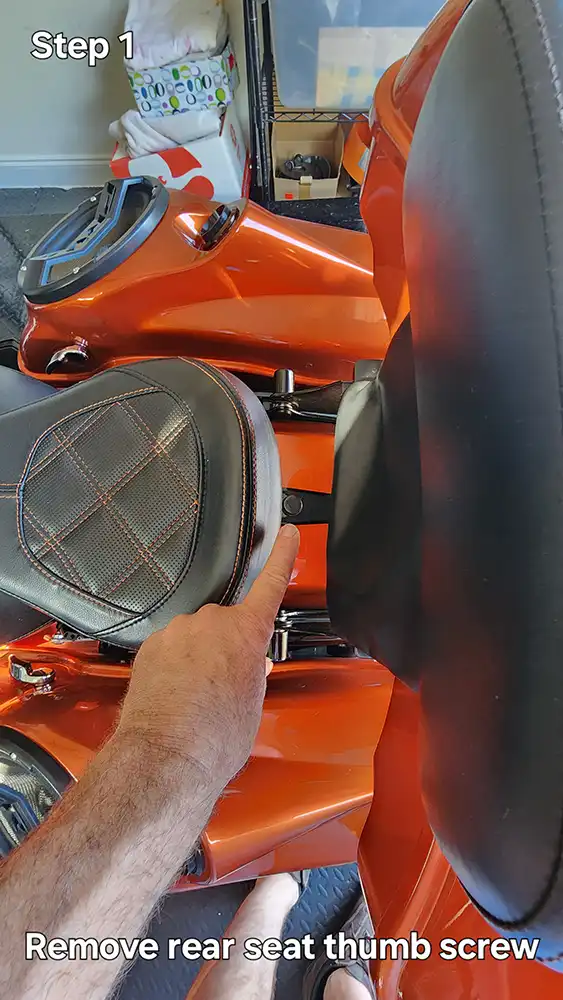


Step 1 : Remove the seat so you have access to the battery and/or accessory plugs/wires.
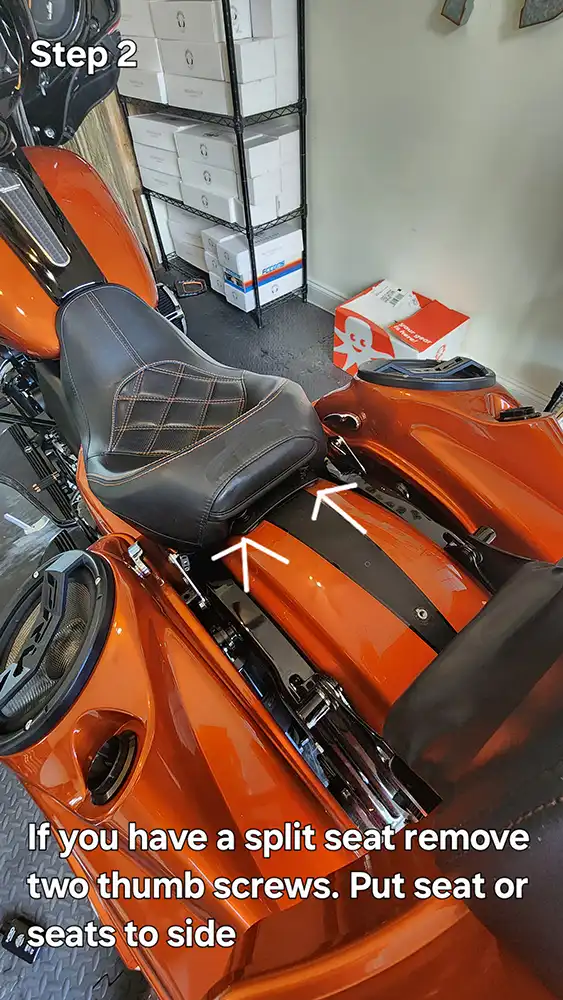
STEP 1. Remove your seat by removing the screw located behind the seat. Lift the rear of the seat and pull the seat towards the rear of the bike.
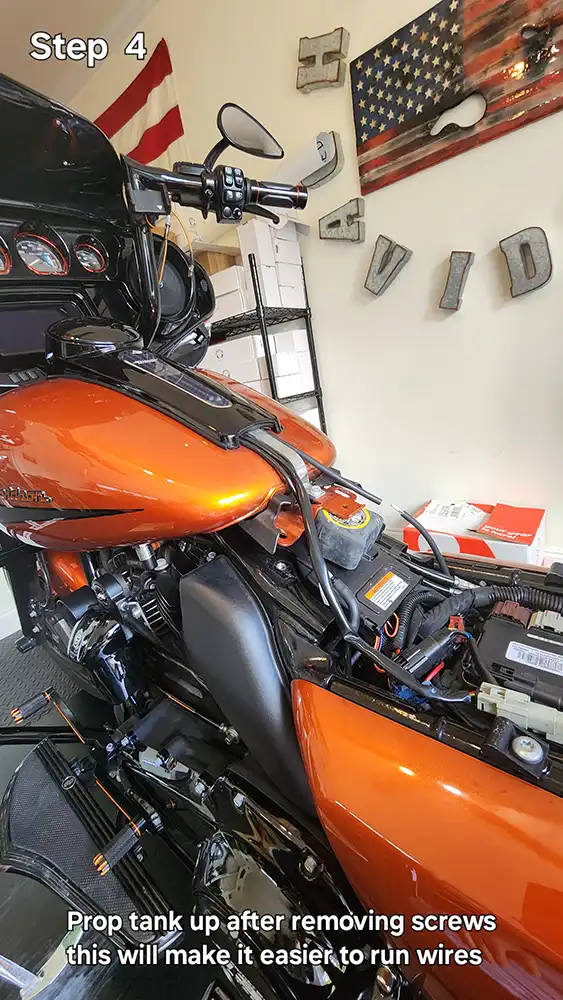
STEP 2. For the proper installation of a frame mount, it is necessary to begin by disconnecting the gas line hose. This step is critical as the gas line hose features a quick disconnect fitting that functions similarly to an air hose fitting. To detach the hose, simply push the chrome collar towards the tank while pulling the elbow downward; be prepared for a minimal amount of gas spillage. It is important to avoid attempting to unscrew the nut at the tank bottom to prevent damage to the plastic tube inside, which could result in costly repairs totaling $75 plus an hour of labor. Subsequently, disconnect the tubes and electric plug connections at the base of the tank, ensuring all connections are properly detached before removing the gas tank. To simplify the task, aim to remove the tank when it is empty or nearly empty.
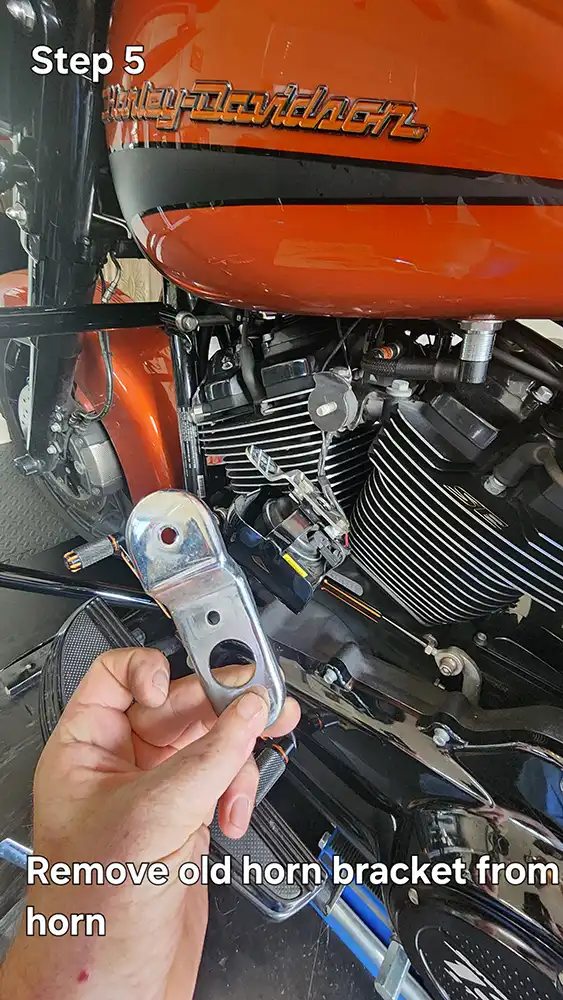
STEP 3. Remove the Chrome Acorn nut that attaches your horn and horn cover assembly to the mounting bracket. Disconnect the two wires from the horn. Put this assembly aside for now.
STEP 4. Remove the two large bolts that attach the Harley Horn Bracket to the engine. You will not re-use this Harley horn bracket.
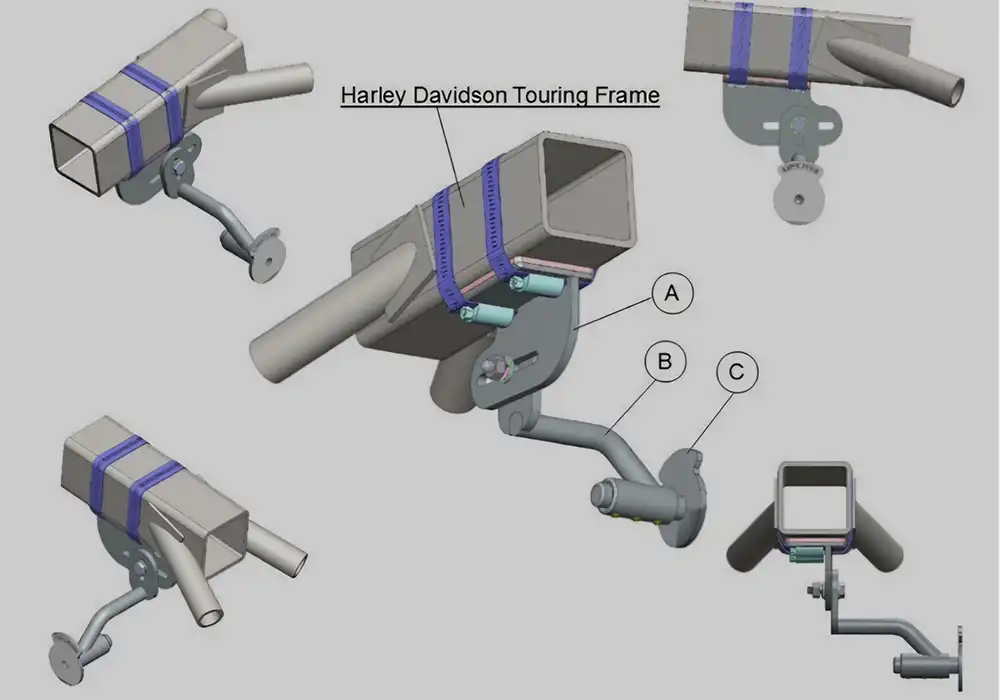
STEP 5. Attach bracket “A” as shown in the drawings. Place the bracket on the bottom of the frame with the rounded and protruding section facing the rear of the bike. (See drawing)
Please note. Ensuring a smooth and efficient process is key to achieving optimal results. One effective technique involves simplifying the securing of the T bracket to the bottom of the frame by utilizing temporary tape to hold it in position while installing the worm clamps. It’s crucial to center the bracket between the two heads, although the placement doesn’t have to be overly precise due to the ample adjustment available in all directions. This versatility makes positioning Baddass Fanz a hassle-free task, resulting in a perfectly customized installation.
Loosen the worm drive screw completely so you can feed the now unattached end over the top of the metal frame, from the Air cleaner side. Next, route the unattached end of the clamp through the slots in the base of the bracket. Insert the loose end of the clamp back into the hub of the clamp and turn the screw clockwise to catch the teeth.
See drawing. (Use a ¼” drive ratchet, extension, and socket to tighten the clamp.) When the two clamps have been tightened, check to make sure that the assembled bracket is straight, secure, and tight to the frame. Now, that the clamps have been installed, you can snip or cut the excess material of the clamps if you wish. (Recommended) so no contact with the gas tank is possible.
IMPORTANT… Position the clamp’s hub so the entire hub is tucked under the bracket. Do not position the worm gear hub on the sides of the frame, because contact with the gas tank can cause the gas tank to rupture, and could result in a gasoline fire if the hub rubs against the gas tank.
STEP 6. Using the hardware provided, attach bracket “B” as shown in the drawings. When the brackets have been bolted together, it’s a good idea to check that the assembled bracket is firmly attached to your frame, Use two fingers to grab the bottom of the bracket and check if there is any movement when you jiggle it in all directions.) This Super Heavy Duty, Solid Stainless Steel bracket has to support a mere Five Pounds! Our Frame Mount Bracket has been Engineered to exceed that load requirement by a factor of 20-1
This Super Heavy Duty, Solid Stainless Steel bracket has to support a mere Five Pounds! Our Frame Mount Bracket has been Engineered to exceed that load requirement by a factor of 20-1. Engineered and designed for a life time of use.
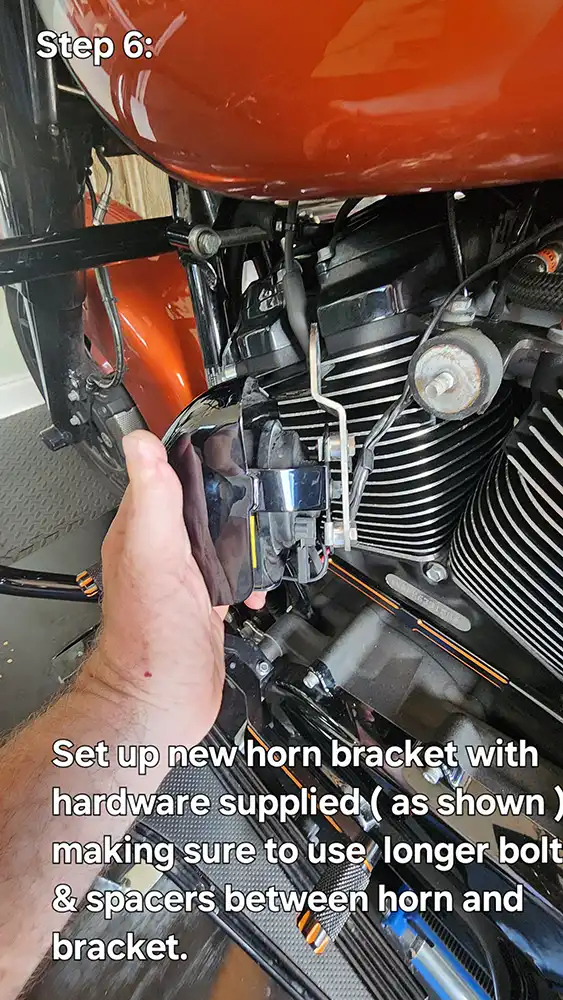
STEP 7. Remove the two ¼” bolts that fasten the Harley horn cover to the chrome Harley horn bracket. You will not reuse these bolts. (Too short) Sandwich the Baddass Fanz main frame between the chrome horn bracket and the horn cover using the two new ¼” bolts, 5/8” long, and two ¼” flat washers, if you have room, install two 1/4” nuts provided to add additional strength to the clips. Make sure that the bottom bolt does not crush into the body of the horn. Harley has used different vendors for their horn over the years which are slightly different so, make sure to avoid a crushing situation of the bottom bolt. Note. You have a choice to have the Lit red switches on the top or on the bottom of the Baddass Fanz assembly, it does not effect the performance in any way.
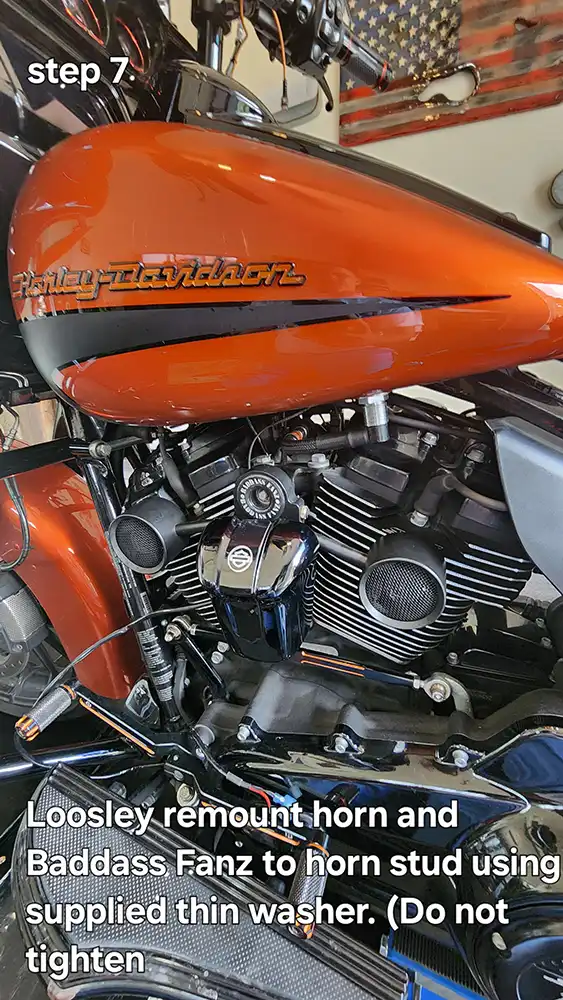
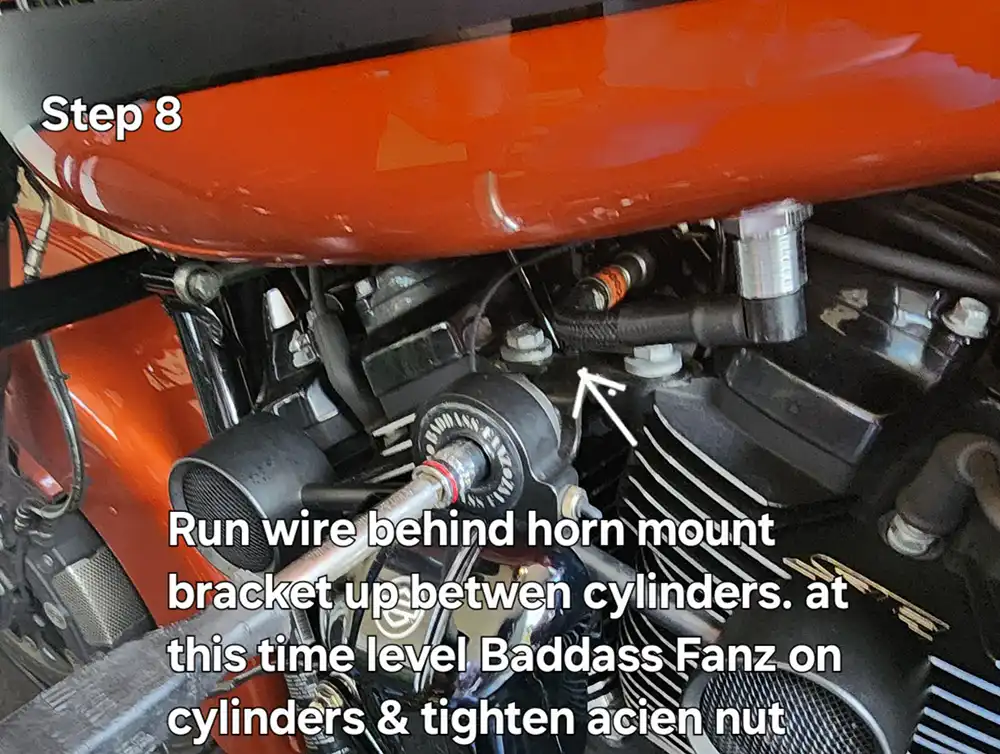
STEP 8. Using the 5/16” X 18 stud provided, Install the original Harley chrome washer and acorn nut to one end of the stud. Next, insert the stud into the Harley chrome horn mount bracket assembly complete with the Baddass Fanz cooling system sandwiched in the middle of the chrome Harley horn bracket and the Harley horn cover. Screw the three I/4” thick rubber washers onto the stud. Bolt the assembled Baddass Fanz unit and horn assembly into the Baddass Fanz name plate rod. 100 – 120 inch pounds of torque is recommended on the chrome acorn nut.
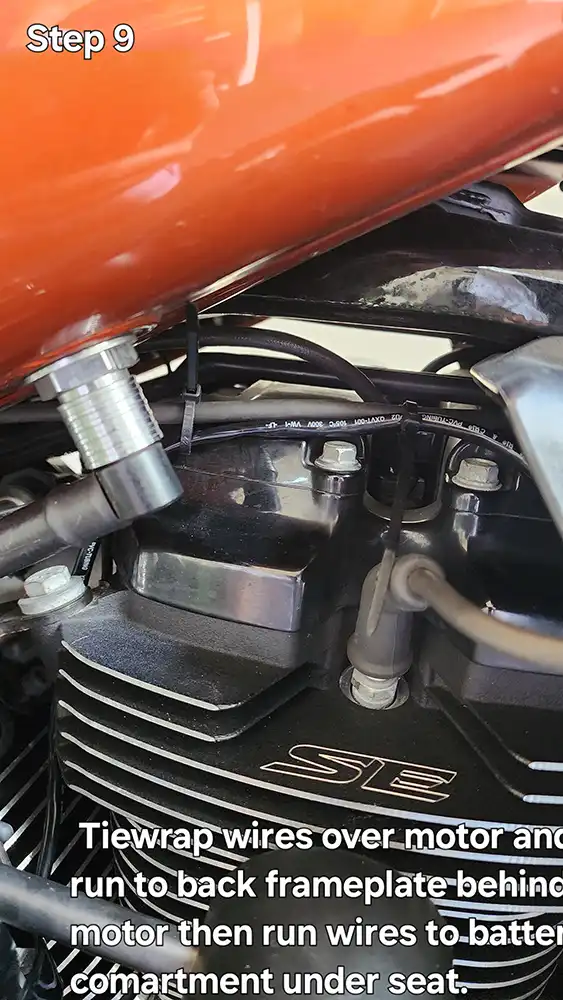
STEP 9. Loosen the three set screws on bracket (2) and slide the rod into the hole in the bracket. Align the Baddass Fanz so they are straight. Tighten the three set screws with the Allen wrench that is provided for this step. Make sure that there is a minimum of one inch between the Baddass Fanz wire harness assembly and the engine.
Check all of the newly installed parts to ensure that the gas line and wires are not in contact with any part of the brackets or engine.